In the previous post, I wrote an introduction about overlay mesh networks, covered traditional and mesh VPN technologies, described the high-level working procedure of mesh VPNs, and compared the two major mesh VPN technology providers. You can find the link to the pervious post at the end of this page. In this post, I will detail the process of setting up a Tailscale free account and the basics of using the Tailscale VPN.
General Procedure for Setting Up Tailscale VPN
The general setup procedure involves three main steps:
- Create an account on Tailscale
- Install Tailscale client on at least two hosts
- Test connectivity between your devices
The entire setup should take less than 10 minutes, and the result will be a secure, peer-to-peer communication path between my devices without the need for a public IP address or complex network configuration. For this guide, I aim to achieve the following topology:
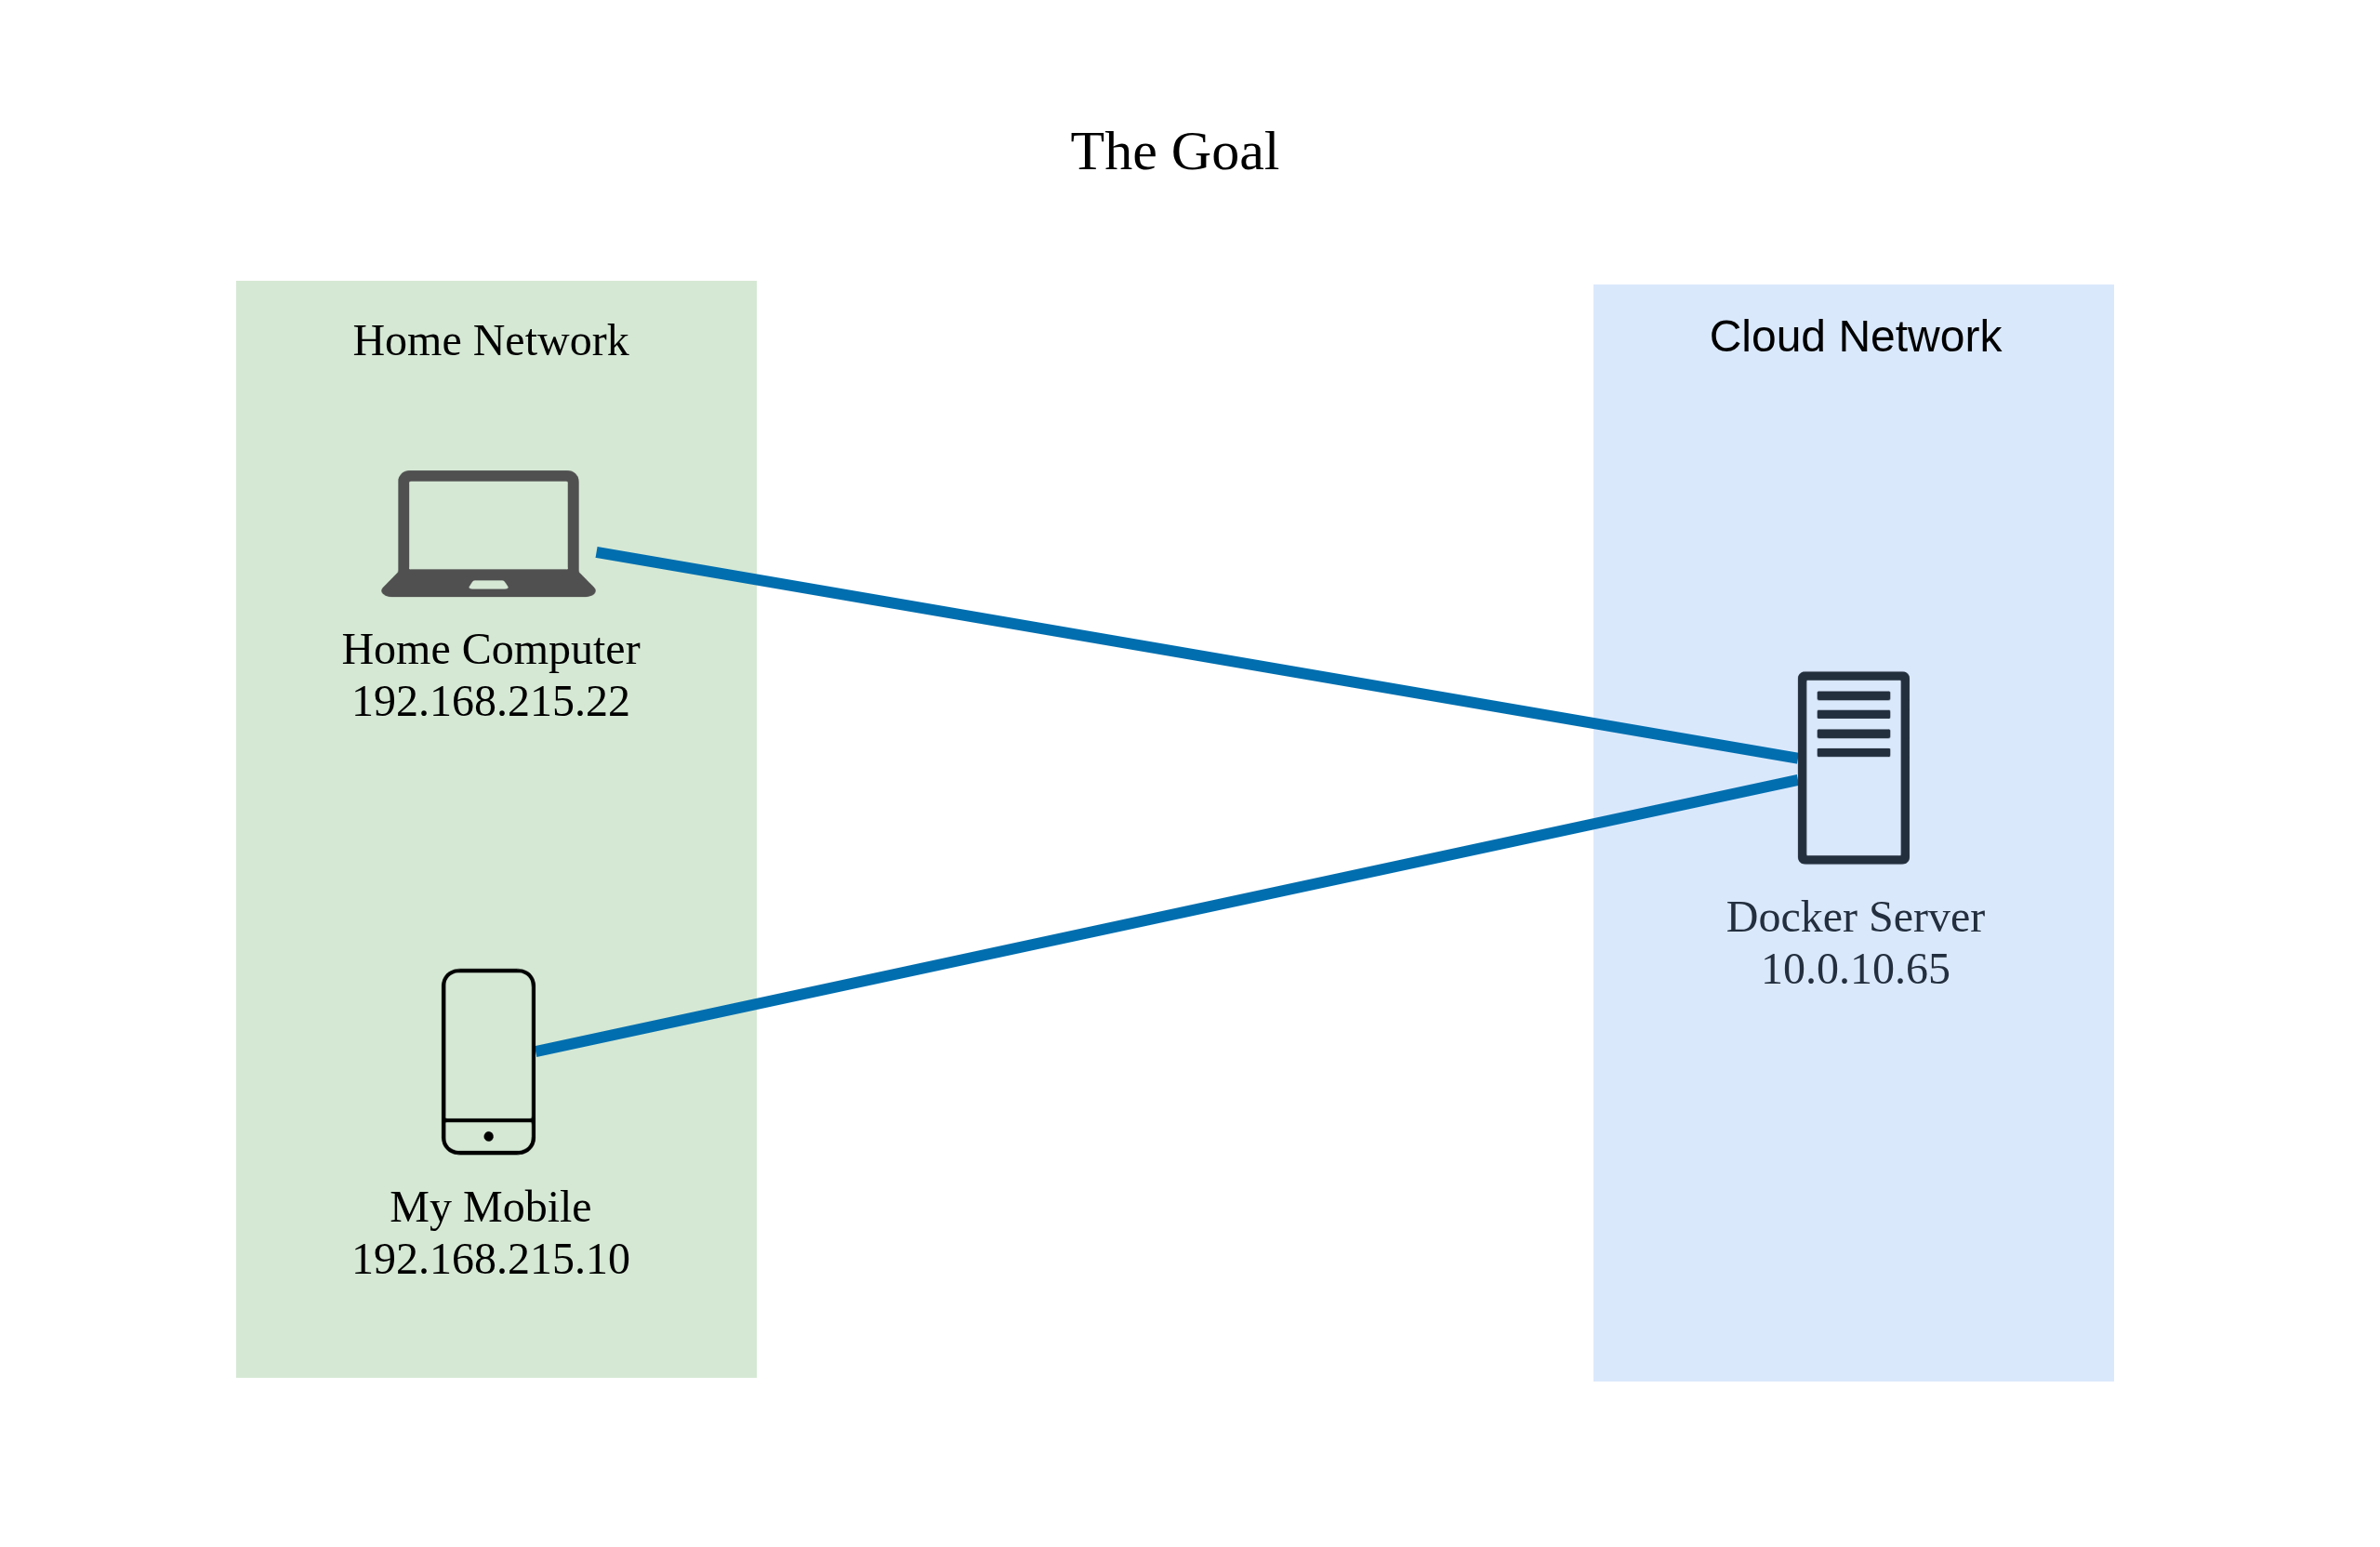
This configuration involves two of my devices on my home network (my home computer and my Android phone) and one device in the cloud behind a private cloud network. I want to:
- Access my Docker server hosted in the cloud from my home devices (computer and Android phone).
- Access my home computer from the Docker server.
As shown in the diagram, none of my devices or networks require static public IP addresses.
Creating an account on Tailscale
Tailscale offers a generous “Free Forever” Personal Plan that allows for up to 100 devices limited to 3 users, which is more than sufficient for my personal use. To begin creating my first account:
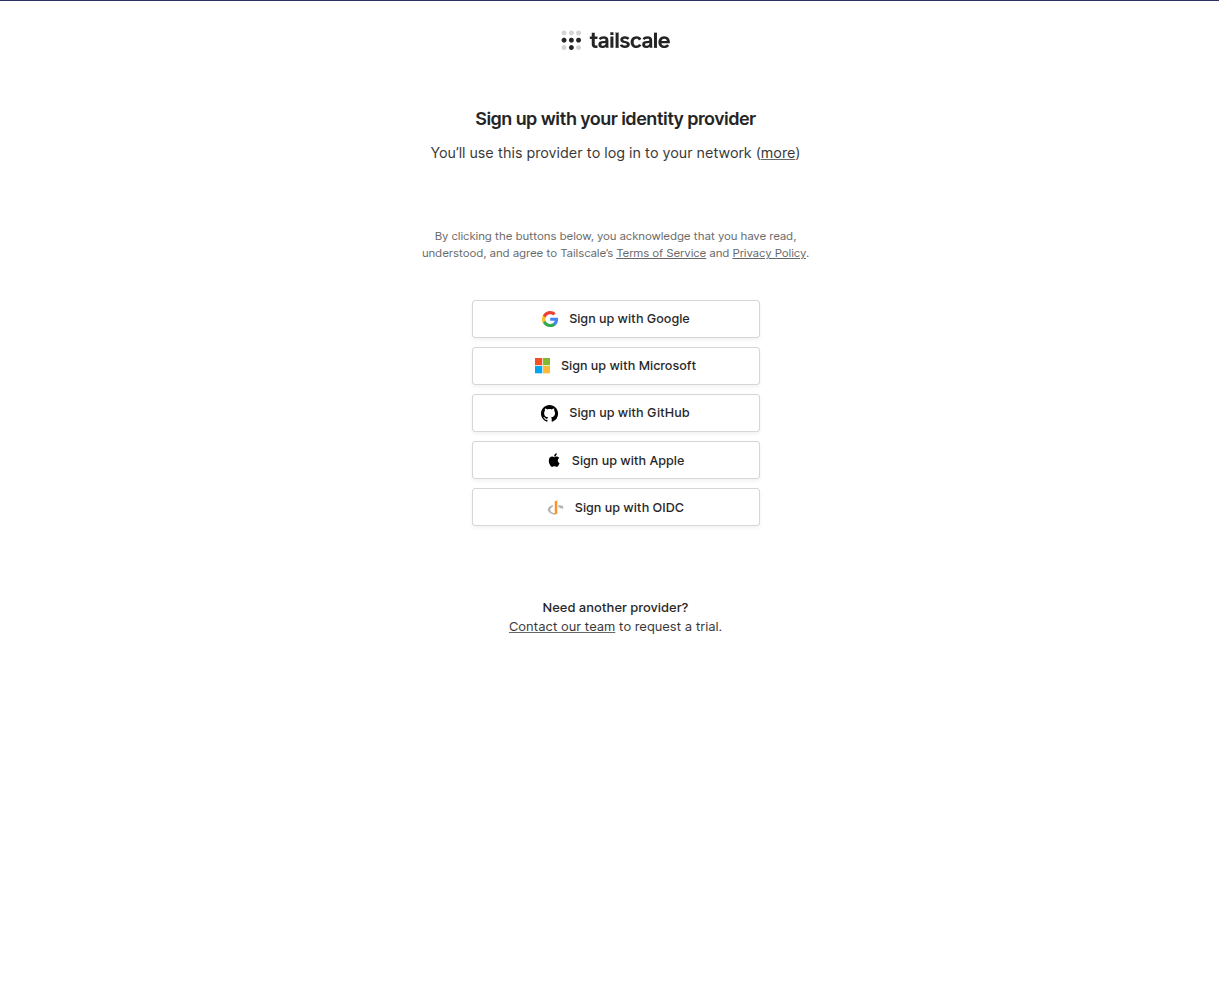
I go to https://tailscale.com/pricing and select the personal plan to get started.
It asks me to choose my preferred Single Sign-On (SSO) provider. I will proceed with my Google account for this demonstration.
Once I complete the authentication and authorization process with my chosen SSO provider, I am directed to a welcome page with a few initial questions.
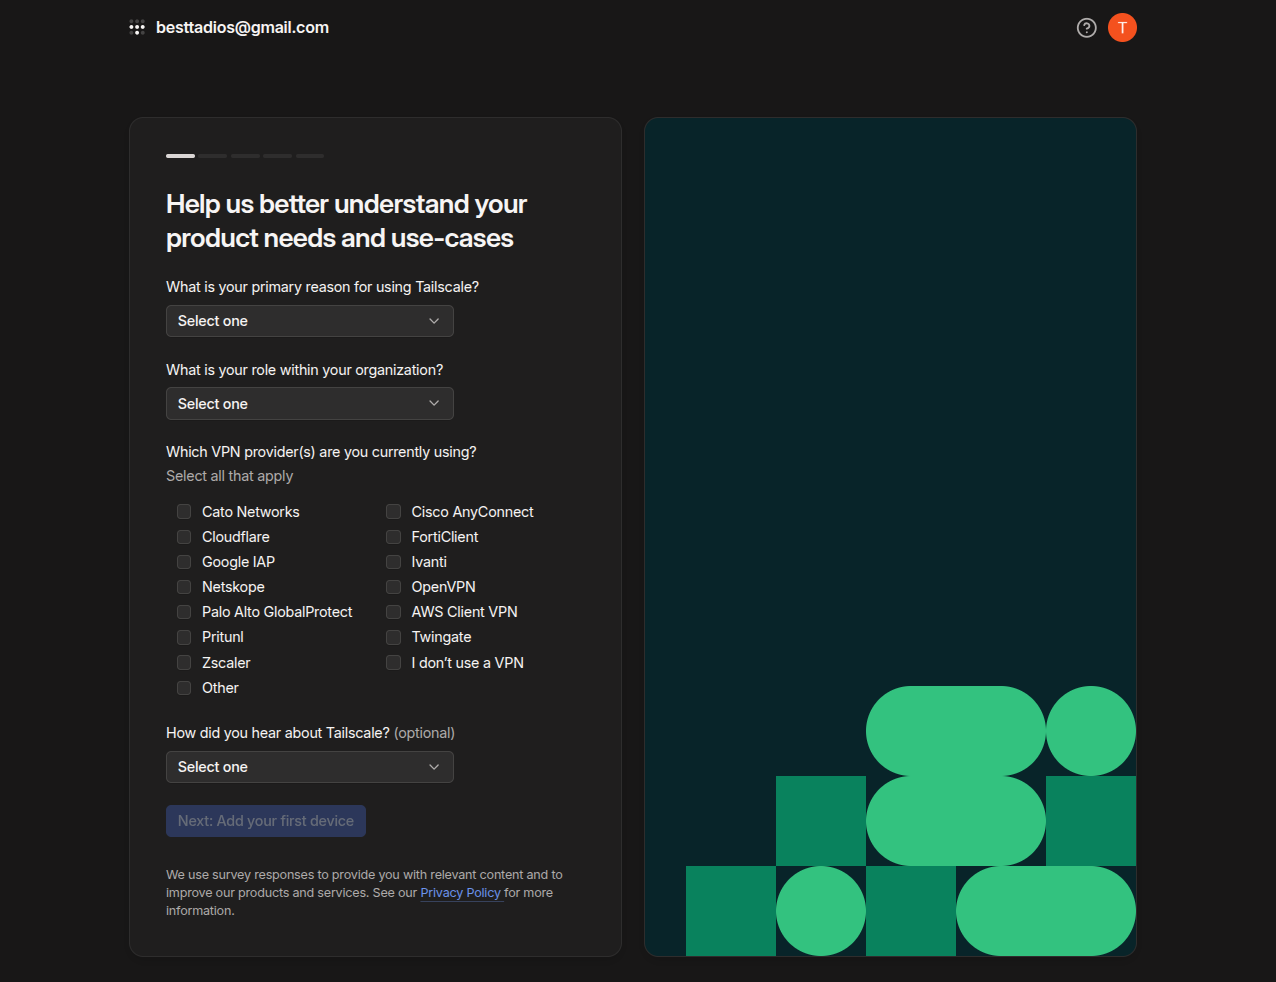
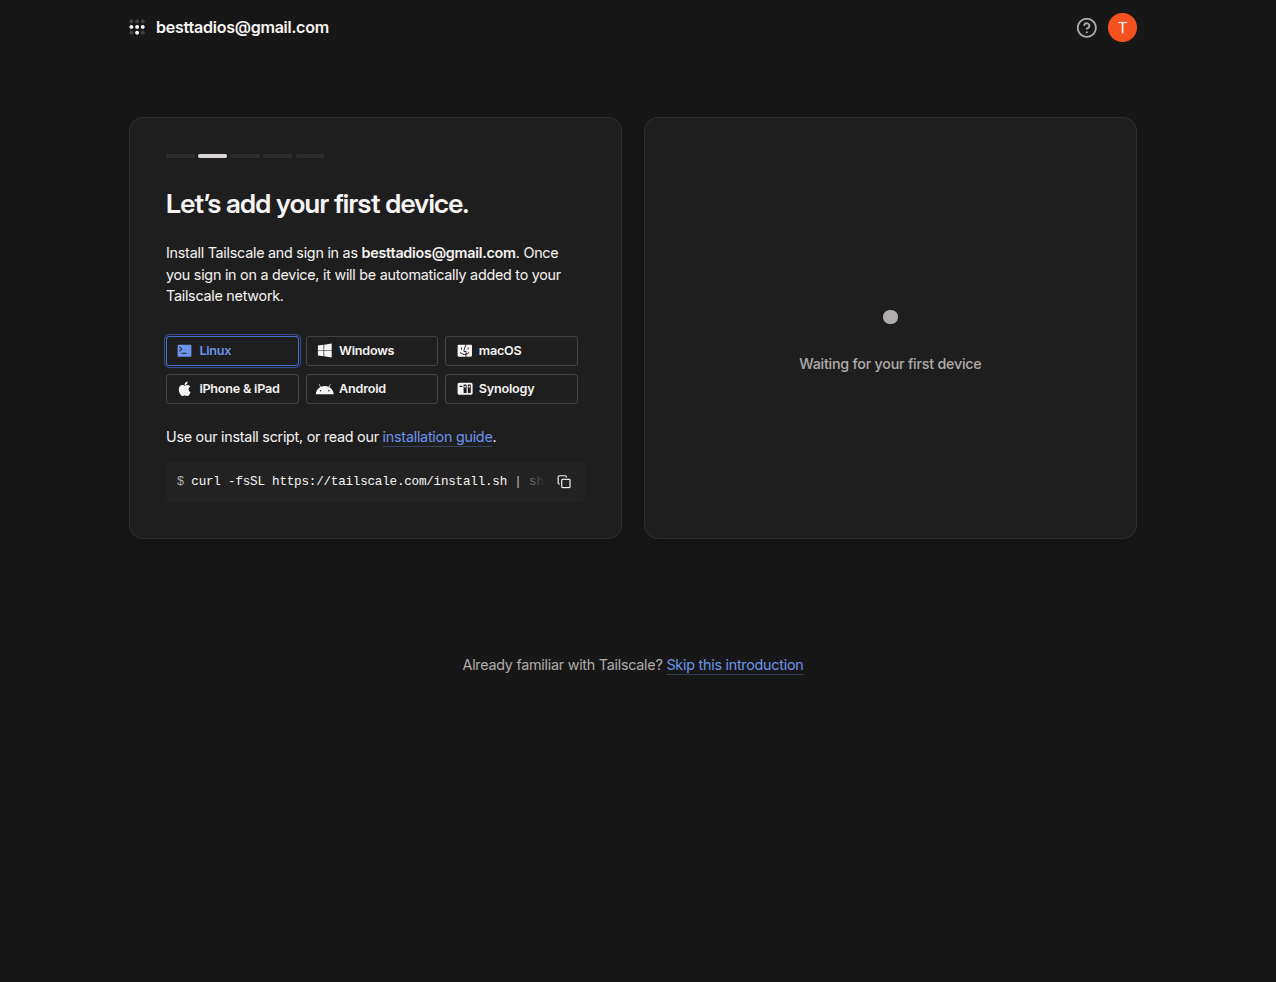
After I answer the questions, the system prompts me to add my first device.
Installing Tailscale client on different devices
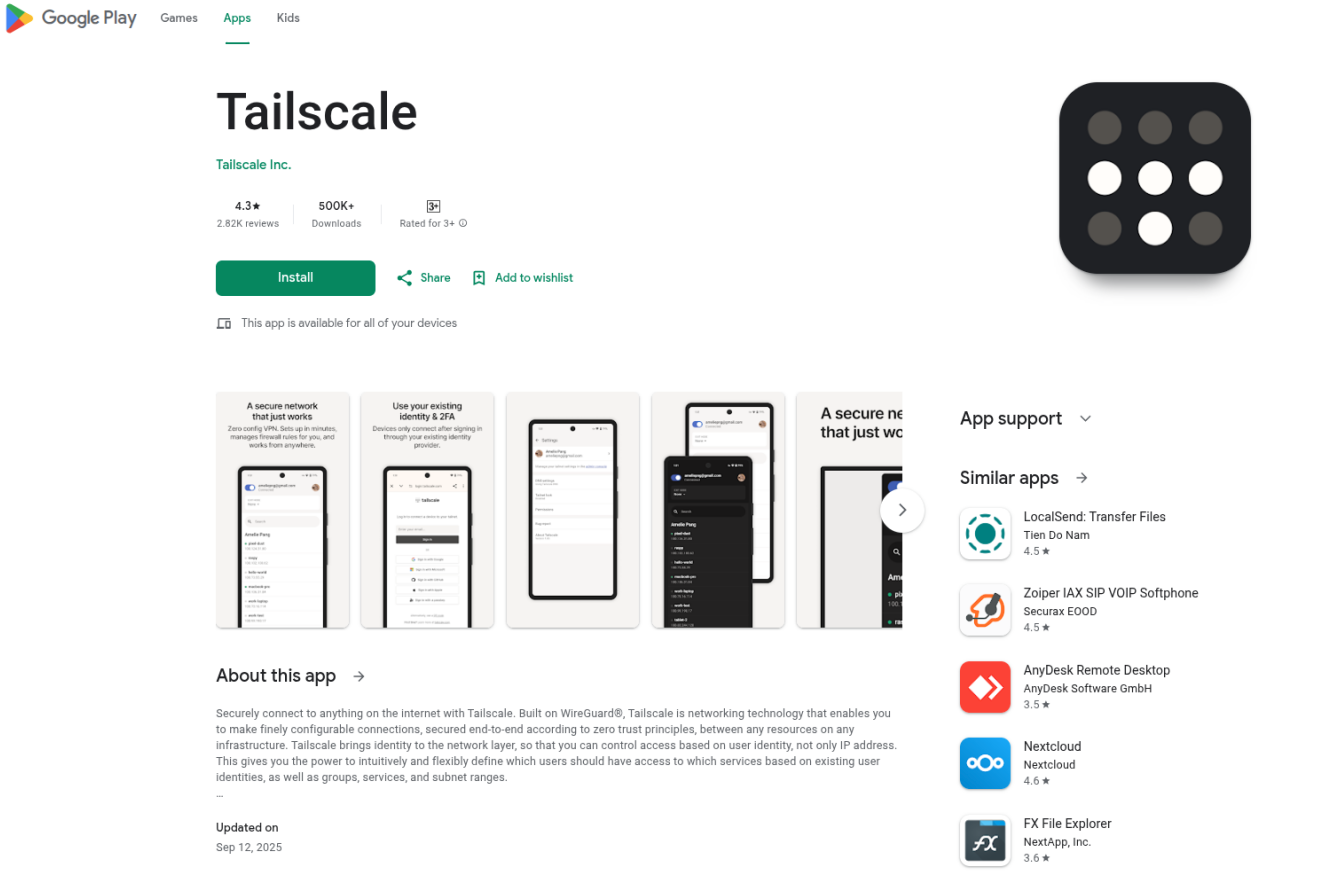
With my Tailscale account created, I can begin enrolling my devices. I will start by adding my Android phone as the first device by installing the Tailscale client from the app store.
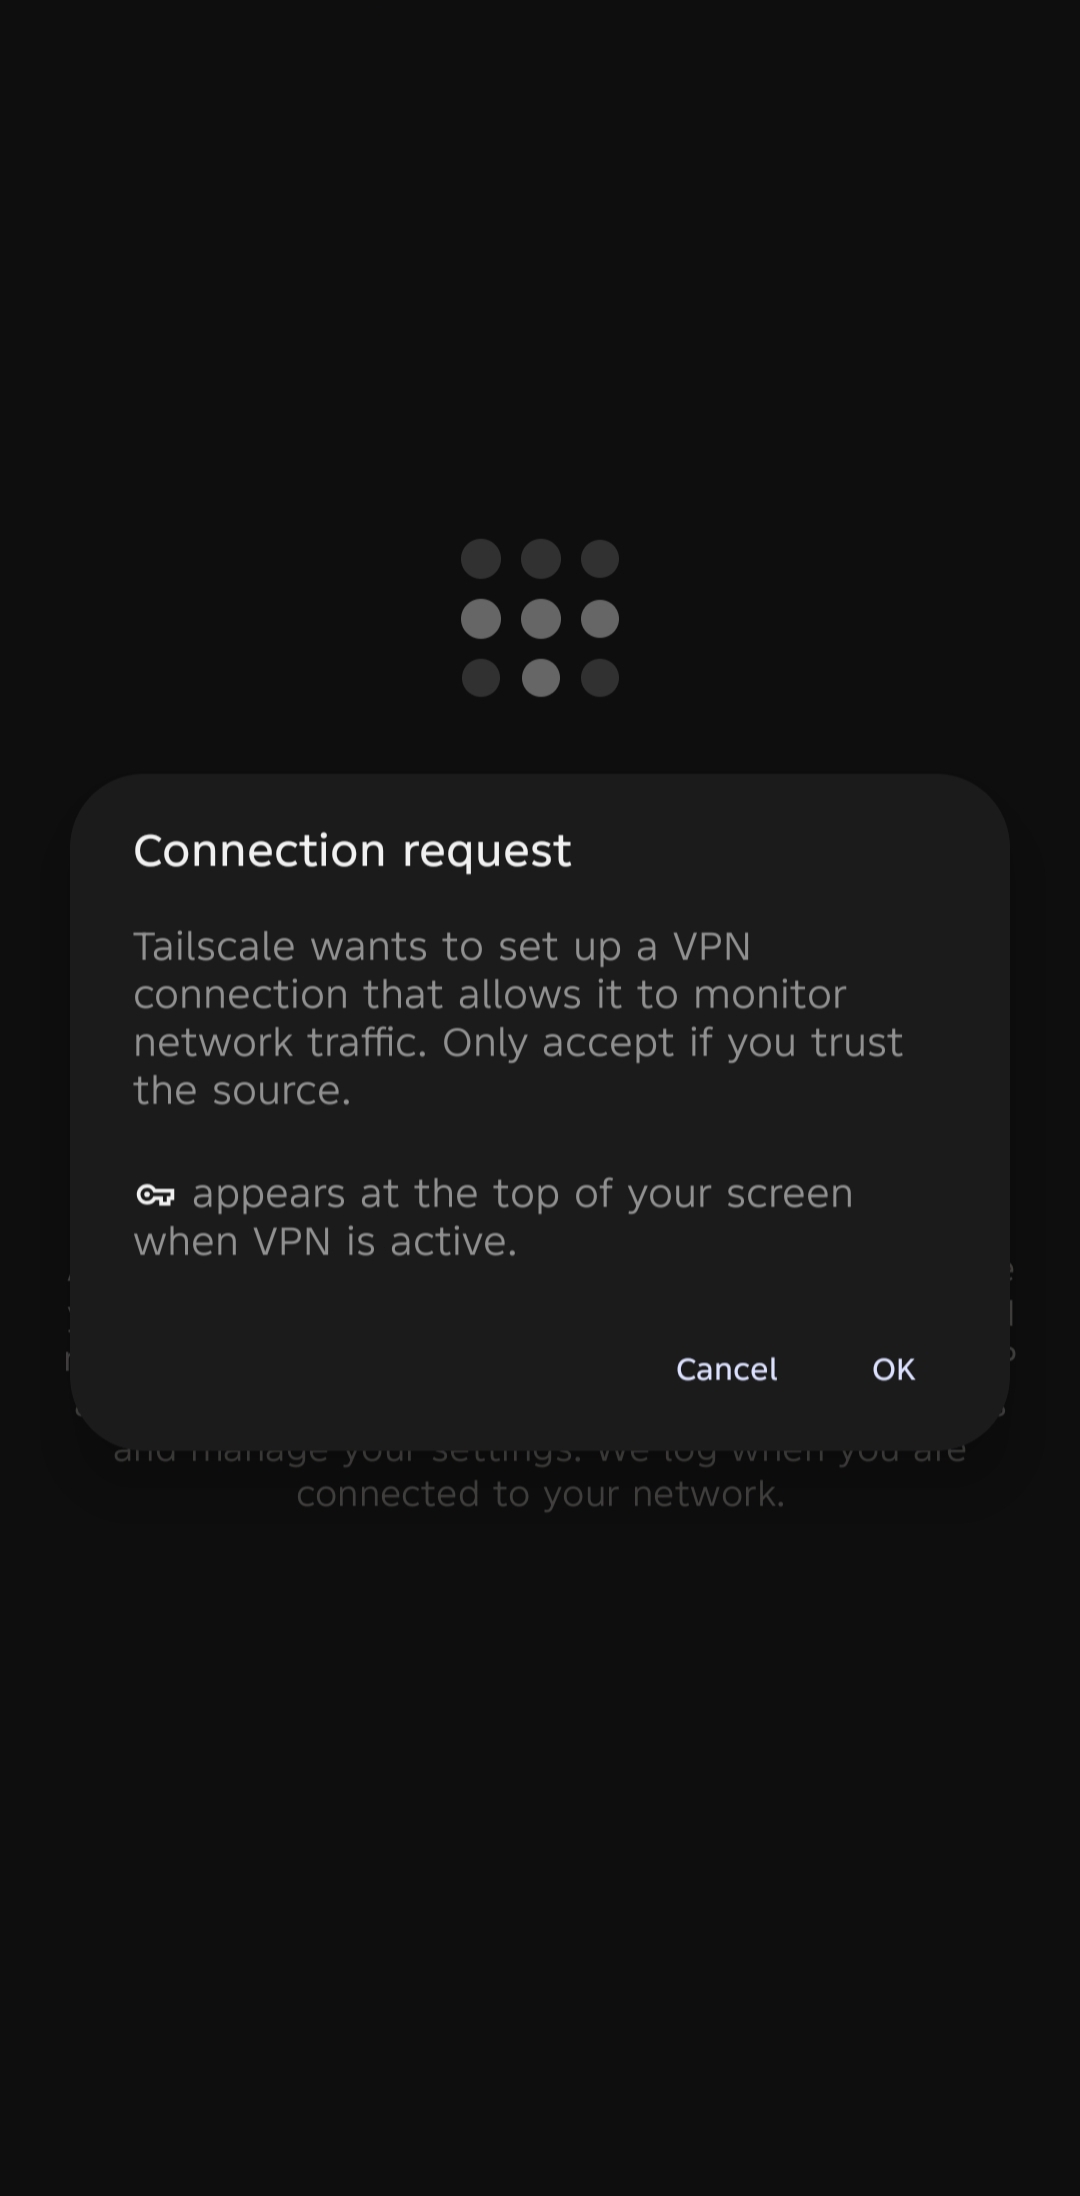
After the installation is complete, opening the Tailscale client on my Android device prompts me for a VPN connection setup. Once this is permitted, I must log in using my SSO provider, just as I did in the previous step.
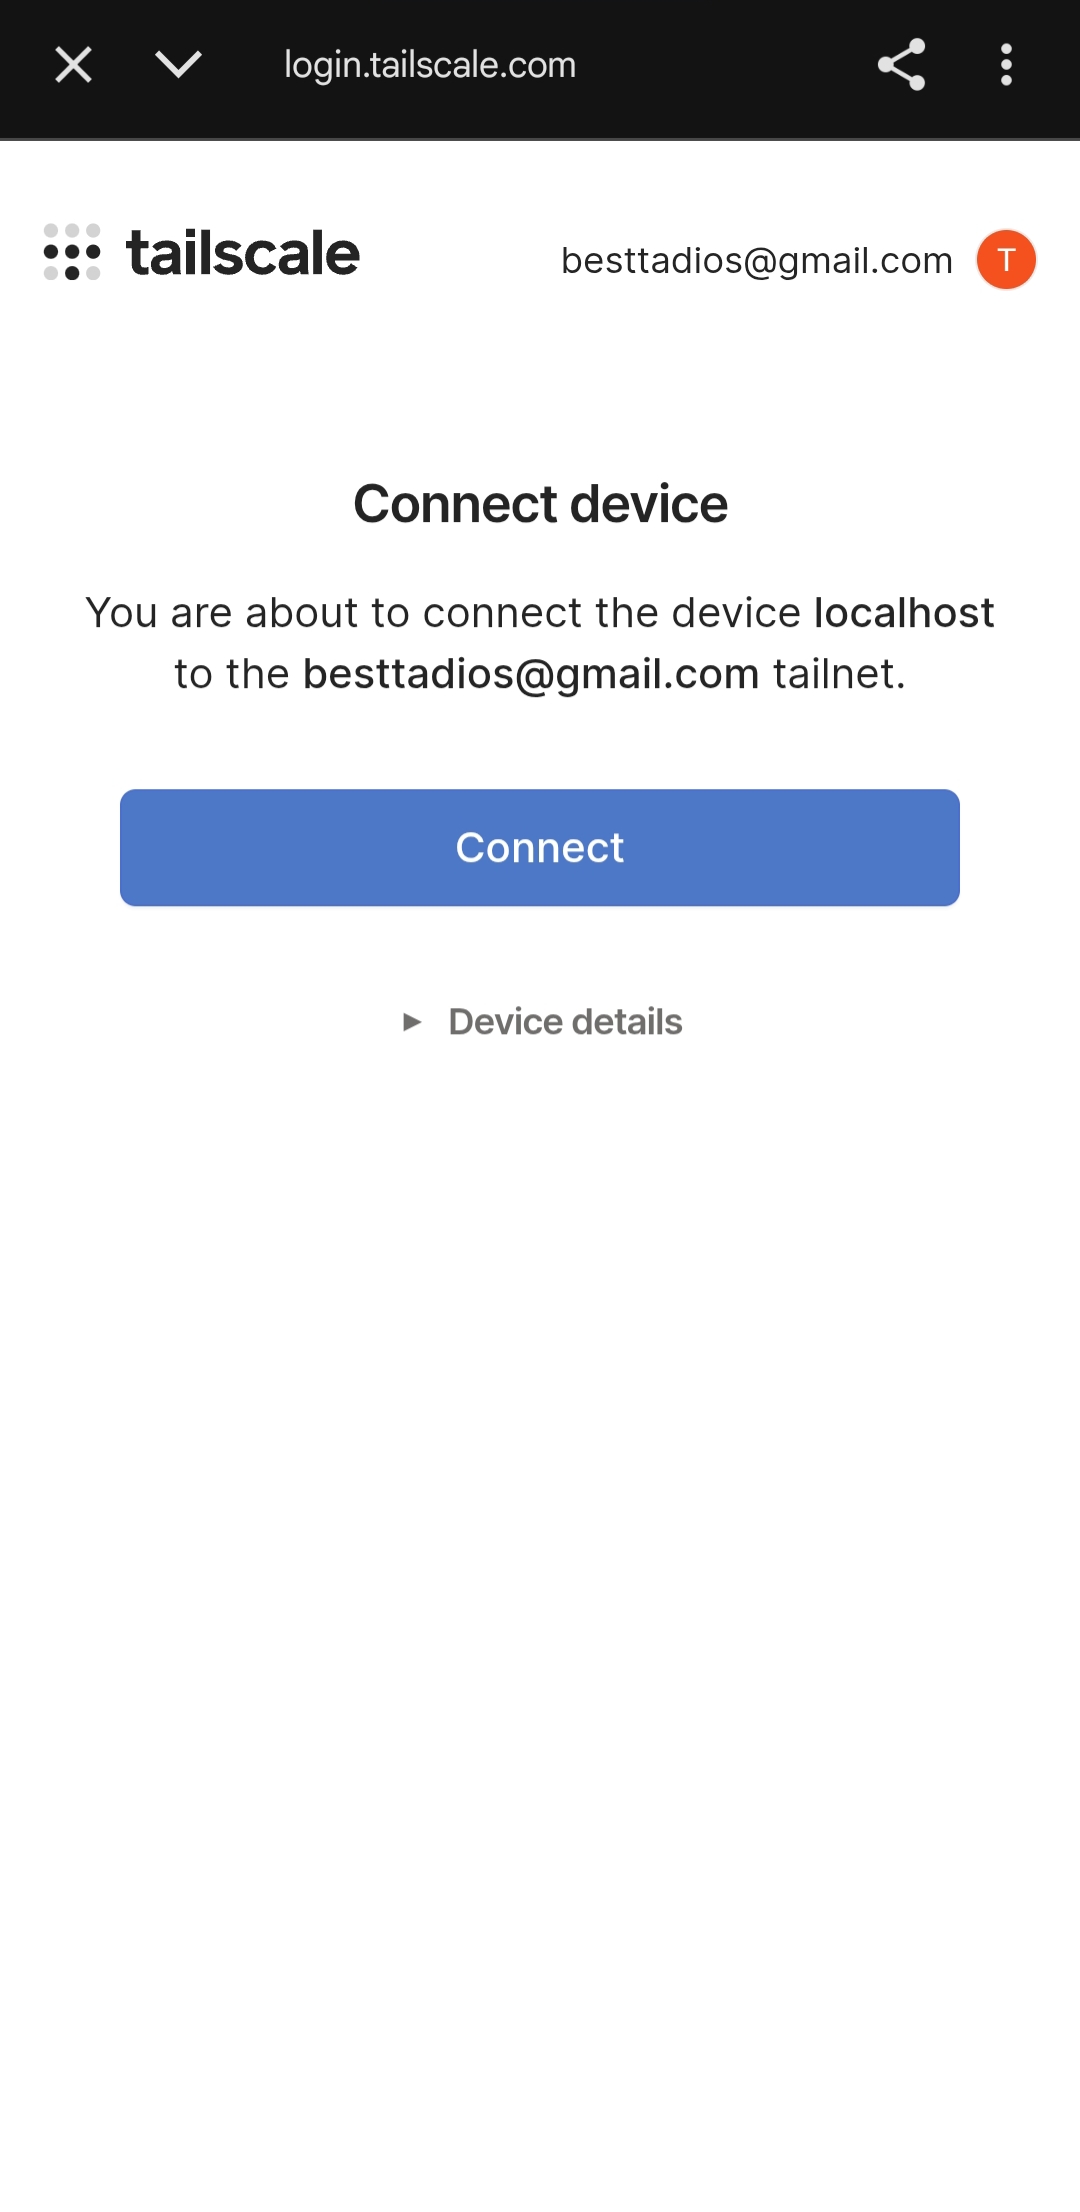
Upon successfully signing into my registered Google account, I am asked to connect the device to my account’s Tailnet. The application will then display a “Login Successful” confirmation.
| Screenshot-1 | Screenshot-2 |
|---|---|
 |
 |
Next, I am going to add my home computer to the Tailscale network by executing the installation script in the terminal:
curl -fsSL https://tailscale.com/install.sh | sh
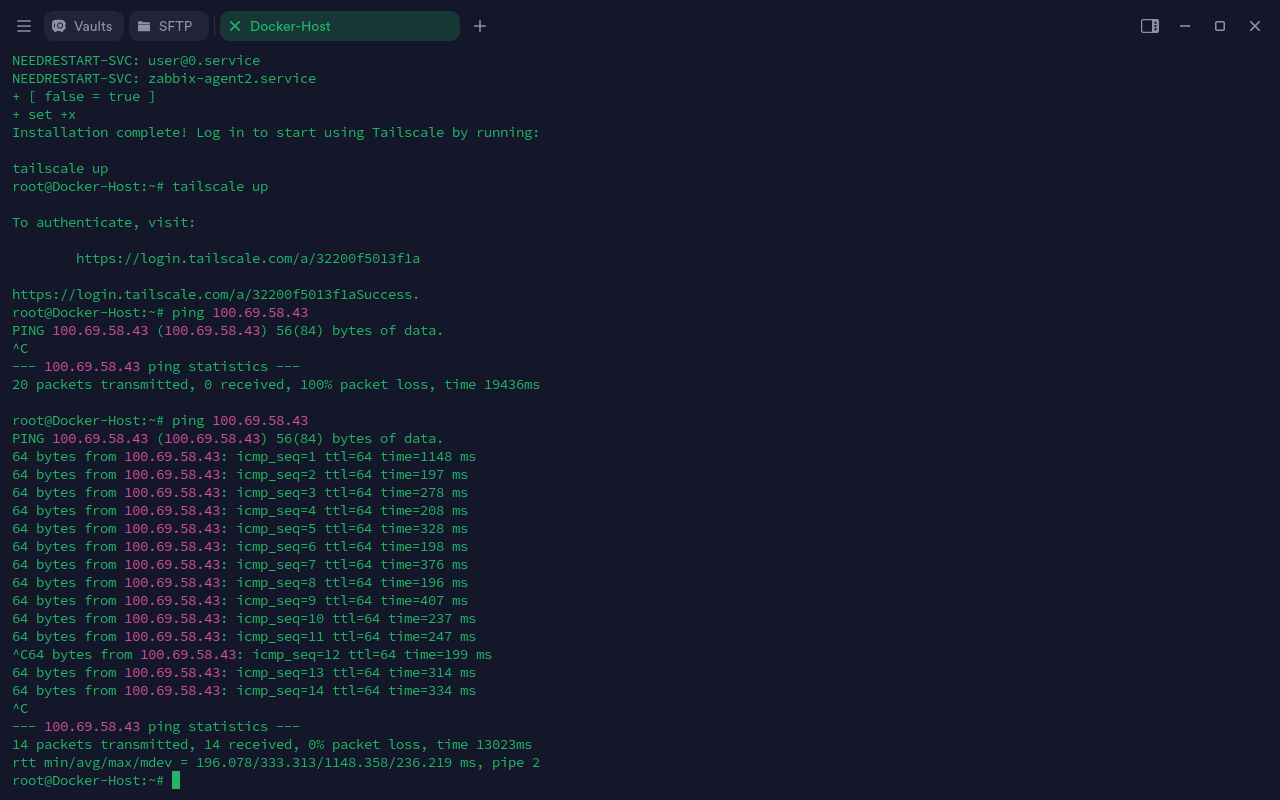
Once the installation finishes, I execute the sudo tailscale up command to connect the client to my Tailnet:
This command provides me with a URL for authentication. I open this URL in my browser and go through the authentication process via my SSO provider, just like I did for the other client.
The final step is to confirm the connection of the device to my Tailnet.
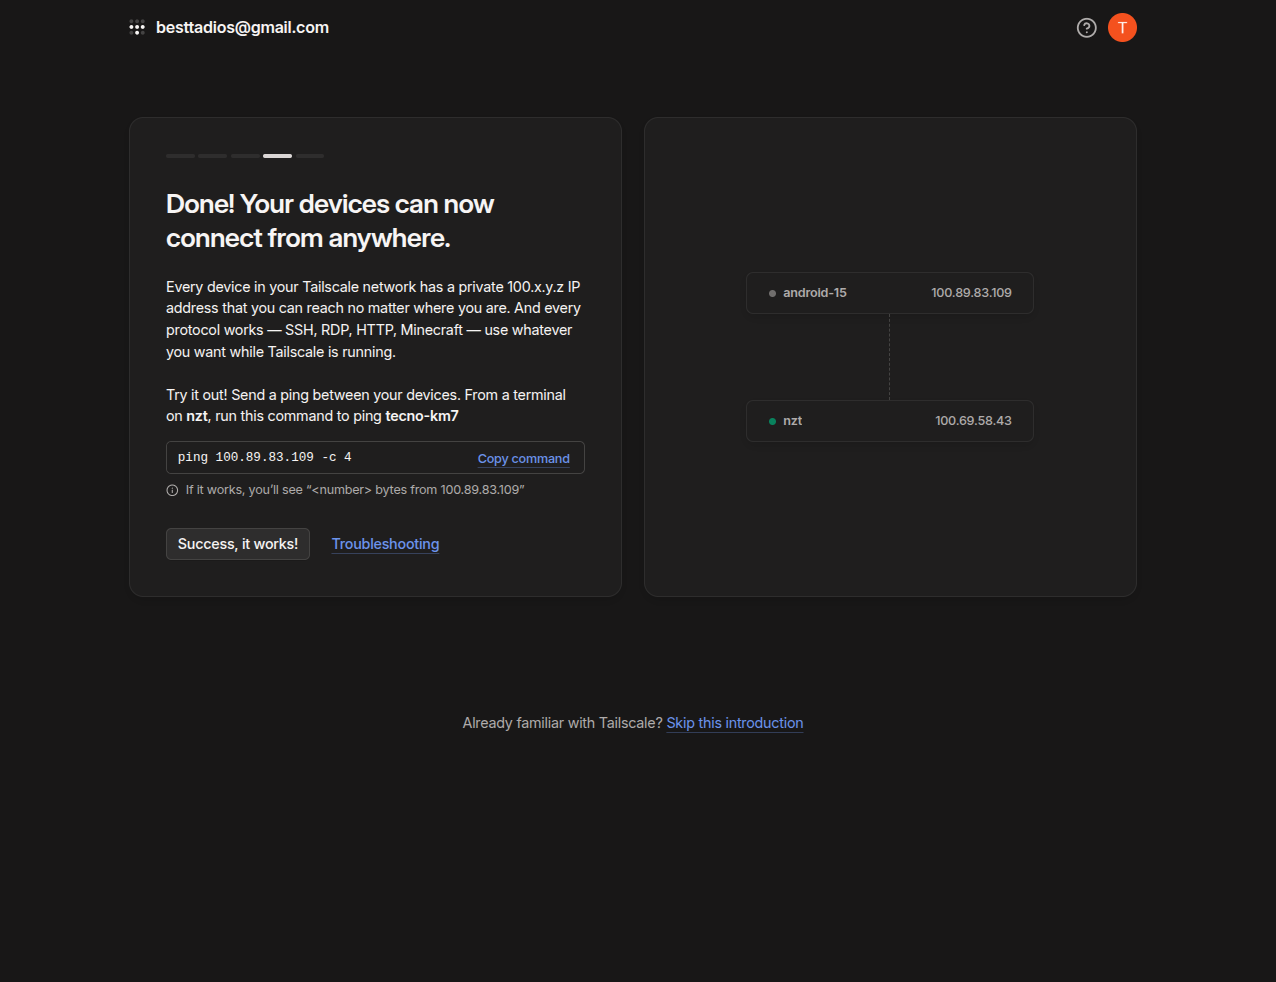
At this point, I have two devices connected to my Tailnet. Returning to the Tailscale website tab shows that both devices are detected. I can finalize the setup by clicking “Success, it works!” and proceeding to the Admin Console.
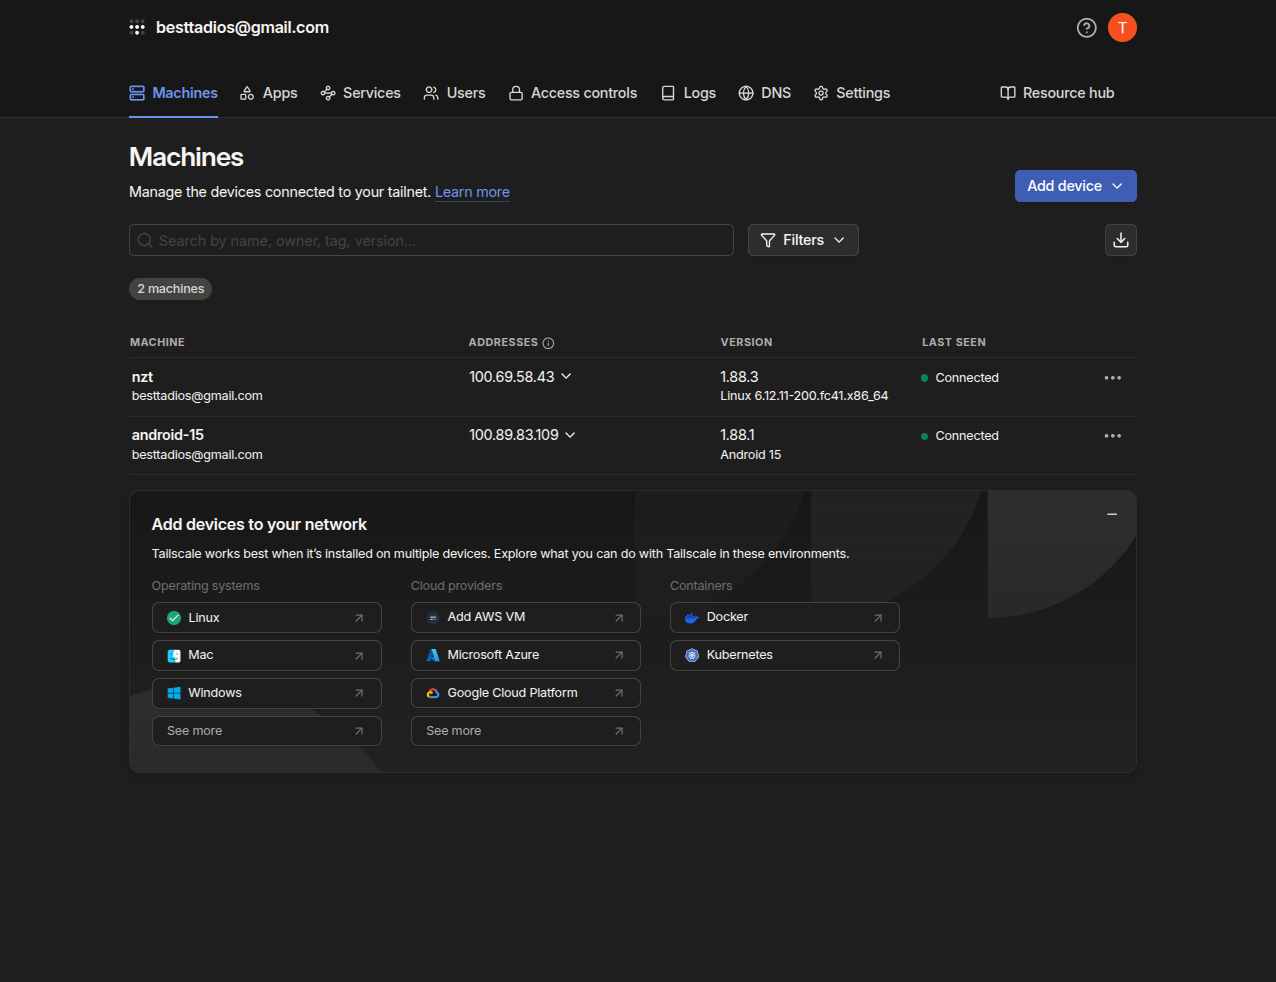
The Admin Console’s Machines Dashboard displays all my connected devices, showing their Tailnet IP address, client version, and last seen status.
Now, I will add one more device my Docker server to my Tailscale network before testing the connectivity.
Testing connectivity between devices
I now have three devices on my Tailnet:
- My Docker host
- My home computer
- My Android phone

Voila! Communication is now possible between all my devices in the Tailnet using either the assigned Tailnet IP address or the device name shown in the Admin Console. For example, I can simply run ping docker-host from my Android device or home computer, or vice versa, and the connection works seamlessly.
Tailscale offers capabilities far beyond basic VPN connectivity, though I will not cover them in depth in this post:
- Apps: Route traffic to third-party SaaS apps through connectors on your Tailnet.
- Services: Monitor live services running on your network’s machines.
- Users: Invite users by generating and sharing an invite link.
- Access Control: Control which users and devices are allowed to connect in your network.
Tailscale Subnet Routers
Another key feature I want to cover is Subnet Routers. This feature allows a Tailscale device to advertise a network behind it, making the devices on that local network accessible to other Tailscale clients. This is useful for devices that cannot run the Tailscale client directly. In such cases, I can install the client on another supported device on the same local network and advertise a route on the Tailnet to the target device.
I will demonstrate this by shutting down the Tailscale client on my home computer and attempting to access it from my cloud hosted Docker server via my Android phone (which will act as the Subnet Router).
- I shut down the Tailscale network on my home computer using:
sudo tailscale down - On my Android device, I go to Tailscale client > Settings > Subnet Routing and add a route to the device I want to access through my Tailscale client. For me, the route was 192.168.215.22/32.
- Then, I go to my Tailscale Admin Console and view my Android phone’s detail page, where a Subnet section shows an awaiting approval subnet.
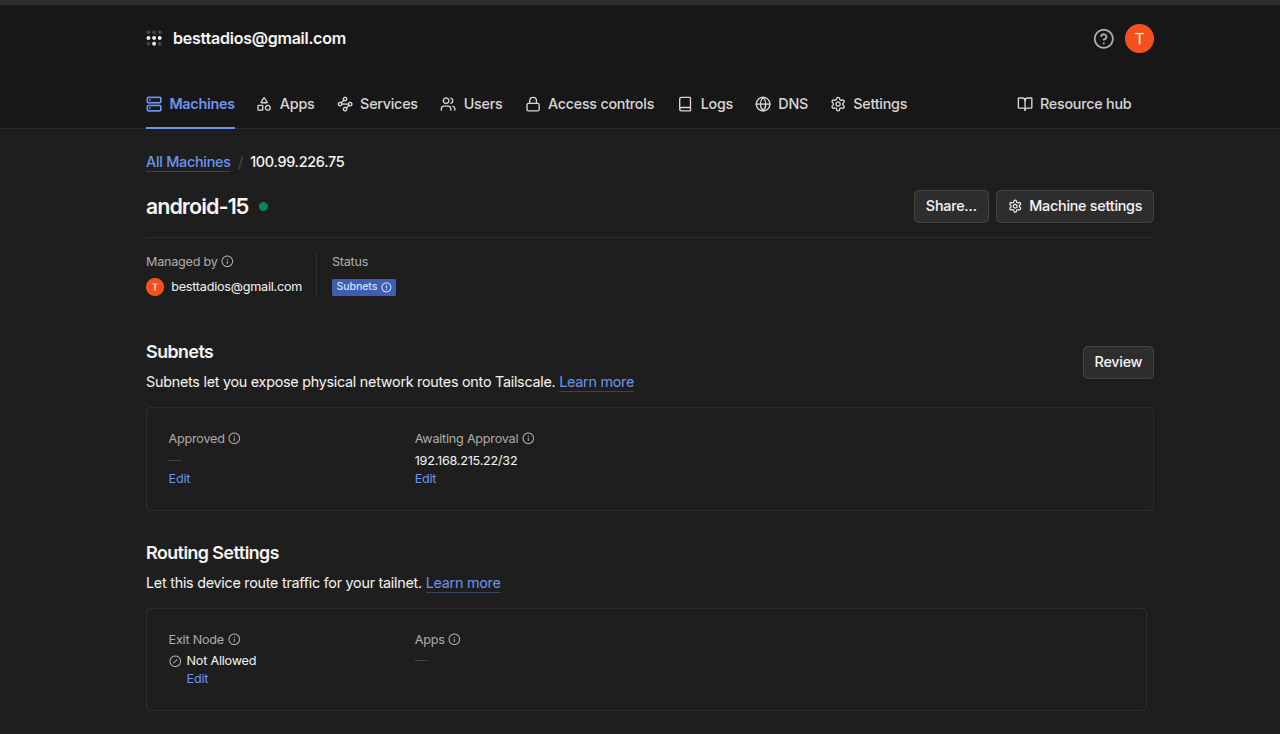
- I click Edit on the awaiting approval subnet, click Approve All, and then Save.
- The subnet is now in the approved section.
- From here, I go to my Docker host machine hosted in the cloud and try to ping the IP 192.168.215.22. It still does not work. This is because on Linux, I need to explicitly tell my Tailscale client to discover new routes automatically by executing:
tailscale up --accept-routes - Now, when I try to access 192.168.215.22 again, I can correctly establish a traffic path.
Tailscale also allows me to use one Tailscale device as an Exit Node, which routes all my public internet traffic through that device, in contrast to the default split-tunnel mode.
Tailscale connection information and troubleshooting
Tailscale uses two main types of connections within a Tailnet: Direct and Relayed.
- Direct Connections are peer-to-peer, meaning devices communicate without a relay server.
- Relayed Connections occur when devices communicate through a relay server (DERP), which then becomes part of the data path.
Tailscale prioritizes establishing a direct connection and will only fall back to a relayed connection if the direct connection fails.
To determine the connection type between my devices, I run the tailscale status command on one of my machines and examine the output.
If a connection is established between devices, the output will show the connection type, such as relay "par" (relayed via Paris) or active; direct 196.188.250.140:41641 (direct connection with IP and port).
For example, in my case below, I can establish a peer-to-peer connection between my Docker host and a device named tailscale on my Tailnet, but I cannot make the same peer-to-peer connection from my Docker host to my Android phone.
root@Docker-Host:~# tailscale status
100.72.92.83    docker               besttadios@  linux   -
100.69.58.43    nzt                  besttadios@  linux   offline
100.109.87.3    tailscale            besttadios@  linux   active; direct 196.188.250.140:41641
100.99.226.75   android-15           besttadios@  android -
root@Docker-Host:~# tailscale status
100.72.92.83    docker               besttadios@  linux   -
100.69.58.43    nzt                  besttadios@  linux   offline
100.109.87.3    tailscale            besttadios@  linux   -
100.99.226.75   android-15           besttadios@  android active; relay "par"
If there is no established or initiated connection between two devices, no connection status will be displayed for the peer:
root@Docker-Host:~# tailscale status
100.72.92.83    docker               besttadios@  linux   -
100.69.58.43    nzt                  besttadios@  linux   offline
100.109.87.3    tailscale            besttadios@  linux   -
100.99.226.75   android-15           besttadios@  android -
In this case, I can run tailscale ping <device-name> to establish or initiate a connection.
root@Docker-Host:~# tailscale ping android-15
pong from android-15 (100.99.226.75) via DERP(par) in 230ms
pong from android-15 (100.99.226.75) via DERP(par) in 225ms
pong from android-15 (100.99.226.75) via DERP(par) in 231ms
pong from android-15 (100.99.226.75) via DERP(par) in 276ms
pong from android-15 (100.99.226.75) via DERP(par) in 198ms
pong from android-15 (100.99.226.75) via DERP(par) in 241ms
pong from android-15 (100.99.226.75) via DERP(par) in 257ms
pong from android-15 (100.99.226.75) via DERP(par) in 218ms
pong from android-15 (100.99.226.75) via DERP(par) in 238ms
pong from android-15 (100.99.226.75) via DERP(par) in 299ms
direct connection not established
As seen from the above output, my Tailscale client on my Docker host tries to establish a direct connection through DERP but finally reports “direct connection not established.”
root@Docker-Host:~# tailscale ping tailscale
pong from tailscale (100.109.87.3) via DERP(par) in 171ms
pong from tailscale (100.109.87.3) via DERP(par) in 176ms
pong from tailscale (100.109.87.3) via DERP(par) in 172ms
pong from tailscale (100.109.87.3) via 196.188.250.140:41641 in 2ms
In contrast, when I try to ping my tailscale device from my Docker host, it tries to establish the connection through DERP and successfully transitions to a direct connection.
Direct Connection Failure
Direct peer-to-peer connection failures in Tailscale typically stem from two primary reasons: Blocked UDP on a firewall or Hard/Symmetric NAT.
- Tailscale requires the ability to send and receive UDP packets for direct connections. If a device is limited to TCP, all connections must go through the DERP relay servers.
- Symmetric/Hard NAT makes establishing direct connections difficult, if not impossible. Tailscale cannot establish a direct connection if both devices are behind a hard NAT.
To check the cause of a relayed connection, I can run the tailscale netcheck command:
root@tailscale:~# tailscale netcheck
Report:
        * Time: 2025-10-05T17:20:00.934472389Z
        * UDP: true
        * IPv4: yes, 196.189.155.1:36390
        * IPv6: no, but OS has support
        * MappingVariesByDestIP: false
        * PortMapping:
        * CaptivePortal: false
        * Nearest DERP: Paris
        * DERP latency:
                - par: 87.1ms  (Paris)
                - mad: 90.6ms  (Madrid)
                - lhr: 91.1ms  (London)
                - ams: 94.3ms  (Amsterdam)
                - fra: 98.2ms  (Frankfurt)
                - nue: 103.7ms (Nuremberg)
                - waw: 116.1ms (Warsaw)
                - hel: 122.7ms (Helsinki)
                - nyc: 162.8ms (New York City)
                - tor: 174.8ms (Toronto)
                - ord: 175.2ms (Chicago)
                - mia: 187.4ms (Miami)
                - den: 194.9ms (Denver)
                - dfw: 196ms   (Dallas)
                - iad: 206.7ms (Ashburn)
                - nai: 217ms   (Nairobi)
                - lax: 217.8ms (Los Angeles)
                - sfo: 217.9ms (San Francisco)
                - sea: 218.9ms (Seattle)
                - dbi: 236.7ms (Dubai)
                - jnb: 246.3ms (Johannesburg)
                - hnl: 265.2ms (Honolulu)
                - sin: 301.9ms (Singapore)
                - hkg: 308.6ms (Hong Kong)
                - blr: 309.5ms (Bangalore)
                - sao: 313.3ms (São Paulo)
                - tok: 321.5ms (Tokyo)
                - syd: 364.5ms (Sydney)
The following two fields are the most important for diagnosing direct connection issues:
| Field | What it means |
|---|---|
| UDP: true/false | Whether outbound UDP works at all. If false → DERP mandatory. |
| MappingVariesByDestIP | If true, you’re behind a symmetric NAT — hole punching will likely fail. |
In the first example above, both seem to be okay for a direct connection. However, in the client report below, I can see that MappingVariesByDestIP is true, which means the device is behind a symmetric NAT and traffic will go through a relay server.
nzt@nzt:~$ tailscale netcheck

Report:
        * Time: 2025-10-05T17:21:37.429160552Z
        * UDP: true
        * IPv4: yes, 196.188.252.138:38501
        * IPv6: no, but OS has support
        * MappingVariesByDestIP: true
        * PortMapping:
        * CaptivePortal: false
        * Nearest DERP: Paris
        * DERP latency:
                - par: 120.4ms (Paris)
                - nue: 133ms   (Nuremberg)
                - mad: 141.4ms (Madrid)
                - fra: 141.7ms (Frankfurt)
                - lhr: 148.6ms (London)
                - ams: 148.7ms (Amsterdam)
                - waw: 159ms   (Warsaw)
                - hel: 161.2ms (Helsinki)
                - nyc: 196.3ms (New York City)
                - ord: 208.3ms (Chicago)
                - tor: 223ms   (Toronto)
                - mia: 226.4ms (Miami)
                - dfw: 235.4ms (Dallas)
                - iad: 237.2ms (Ashburn)
                - den: 257.7ms (Denver)
                - nai: 258.8ms (Nairobi)
                - sfo: 258.8ms (San Francisco)
                - lax: 264.2ms (Los Angeles)
                - sea: 270.3ms (Seattle)
                - dbi: 282.2ms (Dubai)
                - jnb: 289.2ms (Johannesburg)
                - blr: 308.7ms (Bangalore)
                - hnl: 312.1ms (Honolulu)
                - hkg: 345.9ms (Hong Kong)
                - tok: 350.6ms (Tokyo)
                - sao: 422.6ms (São Paulo)
                - sin: 433ms   (Singapore)
                - syd: 482.7ms (Sydney)
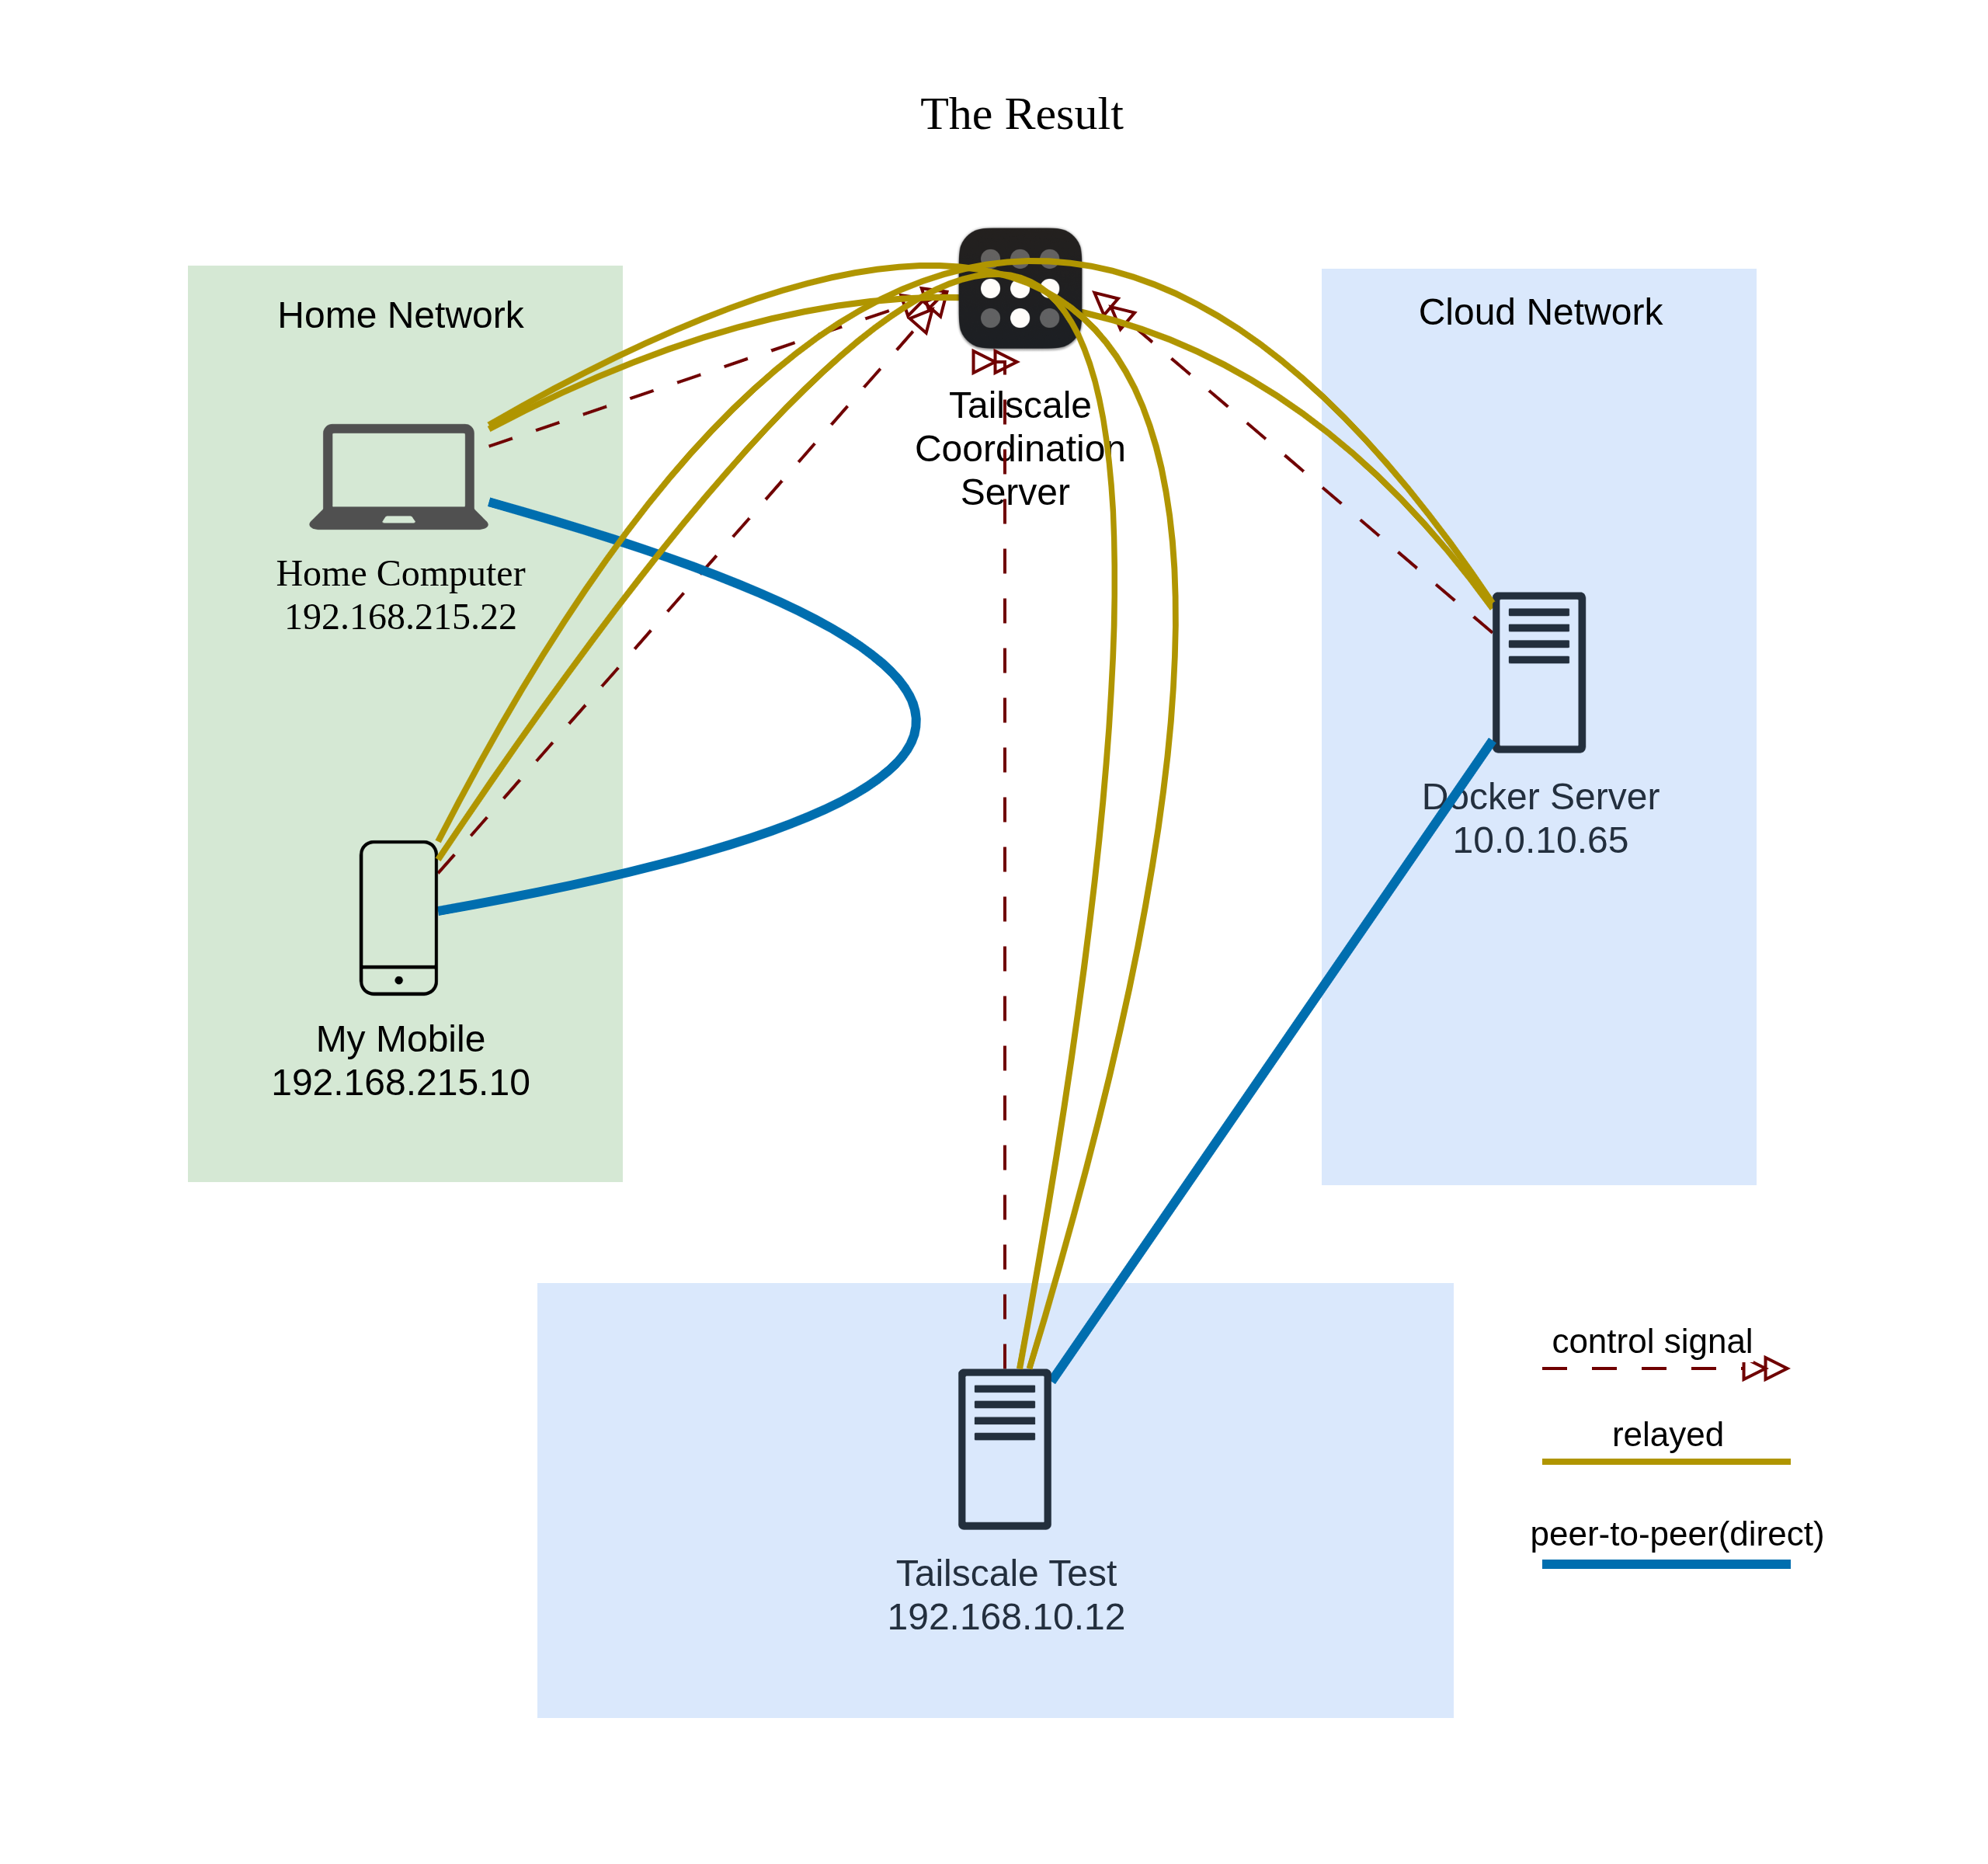
Final Topology
Finally, even though the achieved network setup was not identical to the network plan I introduced earlier, I have achieved the below network topology. I was able to successfully create a mesh network between all my devices on my Tailnet, but my home computer and my mobile phone were not able to create a direct peer-to-peer connection with the rest of my devices, so the traffic was relayed. Judging from MappingVariesByDestIP: true on my home network device, I guess this happens because my home network is on a wireless 4G network where my provider is using some sort of CGNAT for its mobile network.